Anyways... I was faced with the problem of creating zoomed insets for a paper. In my first naive attempt, I used an image editing software (gimp to be exact) to tackle the problem. What was the problem with that? I had to deal with many annoying point and click operations. No fun at all. Then I thought about using ImageMagick. After a few attempts at the command line, this is what I came up with:
convert image.bmp -resize 600x390 \
   \( image.bmp -crop 230x110+240+240 -bordercolor black -border 1x1 \) \
      -gravity NorthEast -composite \
   \( image.bmp -gravity NorthWest -crop 150x80+220+540 -bordercolor black \
      -border 1x1 \) -gravity SouthEast -composite \
   -fill none -stroke black -draw "rectangle 120,120 235,175" \
   -draw "rectangle 110,270 185,310" \
   image_small.bmp
Here is an example of what can be achieved with this one-liner.
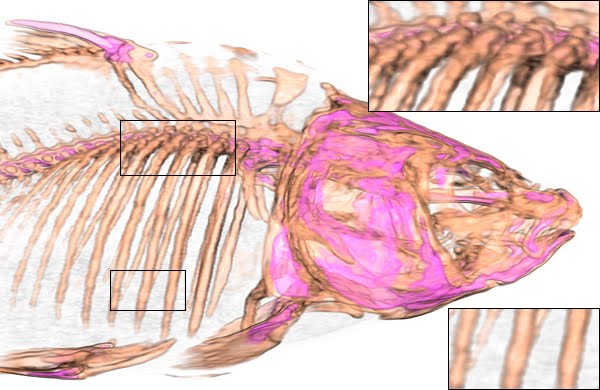
The insets come from the original high resolution image image.bmp, and are specified by cropping a rectangular region. The working stack provided by ImageMagick comes in really handy for this purpose. Finally, the images are composited and rectangles are drawn in the appropriate locations.